Inspired by We're Going to Make It's Astrological Sign Trinket Dish, I created one of my own with the constellation Cassiopeia, my favorite constellation. I really love the way it turned out. The instant I saw this project on their blog, I knew I had to make it.
Materials:
- clay (oven-bake)
- cup or bowl
- plastic knife
- pencil (or other object with a point)
- acrylic paints
- paint brushes
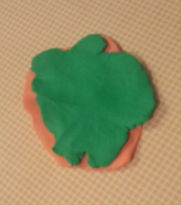
I started with just the green clay, then realized that I'd need more, so I added orange. I'd suggest using a lighter colored clay so you don't need to use as many coats of paint for full coverage.
I rolled out the clay and cut it into a circle by tracing around a mug. Once I had my clay into the shape I wanted for my dish (I crimped the edges with my fingers), I took a pencil to poke holes where the stars of the constellation would be and then dragged the pencil to draw faint lines connecting the stars.
I kept fiddling around with the shape, trying to perfect it, but I eventually said enough is enough and put it into the oven according to the directions. My dish probably could have baked a few minutes longer because it is still a little bendable.
After letting the dish cool, I started painting it. I used a light blue for the top and for the bottom, I mixed a few colors to get somewhere between a forest green and turquoise color.
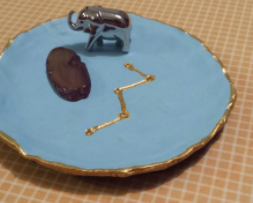
For the last step, I went in with gold acrylic paint to fill in the constellation and also made a gold edge around the tray.


 I'm really happy with the way my trinket tray turned out! It would be a great holiday gift for someone who loves the stars; you could do either one of the Dippers or their astrological sign, as was done by We're Going to Make It ~ thank you for the inspiration.
to see how I made the Galaxy Bracelet in the image above, click here